Showing posts with label Flowers. Show all posts

Friday, January 17, 2014

Bouquet Wrap Ideas

The wrap you choose for yourself and bridesmaids is almost as important as your gorgeous wedding bouquet. The wrap, being the ribbon, diamantes, buckle etc that ties the bouquet stems together giving your stems some zoosh, should compliment your flowers whilst being in theme with your wedding colours and decorations. 

We have gathered some of our favourites for inspiration, your florist should be able to give you some ideas also.

Brooches and Diamantes are a gorgeous addition for the bling loving bride
Feathers, beads and sequins for the winter bride
A rustic touch of material with a ribbon to compliment the flowers 
We love the gorgeous sparkly gold ribbon for a antique themed wedding
Hemp and Lace for the rustic bride
Lace and pearls for the vintage glamorous bride
Corset rhinestone wrap available on etsy.com
A simple touch of raffia and a brooch is romantically delicate
Adding initials on the bride and bridesmaids bouquet is perfectly personalised

Sunday, January 5, 2014

DIY Floral Headpiece

A fresh floral headpiece adds a gorgeous touch to a spring bride. Believe it or not they are very easy to DIY and we just love the imagery as seen on ruffledblog.com.

What you will need:
  • Sturdy wire
  • Florist Tape
  • Fresh Flowers*

*TIP: Be sure the flowers you choose are hardy as they will be sitting on your head, possibly in the sun for many hours. Delicate flowers will brown and wilt so we recommend roses, peonies, orchids, lilies and dahlias as these (plus others - check with your florist) will withstand the heat. To ensure your piece is fresh it would be best to assemble either the very last thing you do the night before or even better that morning. DO NOT store in the fridge as they will freeze the petals instead keep fresh by spraying with water.

Step 1: Make a crown sized to your head (we recommend going a little larger) with wire or you may like to choose a thin headband.

Step 2: Prepare your chosen flowers by cutting the stems down to around 7cm long and bunching them with some greenery, berries or feathers (be as creative as you like). Place the stems on the your crown and secure with florist tape by wrapping it around over and over until safely secured. Continue doing this until your crown is as full with flowers as you wish.\


Source: www.ruffledblog.com 

Goodluck - we would love to see your DIY headpieces so be sure to send them in!

Yasmin xo 


Thursday, June 21, 2012

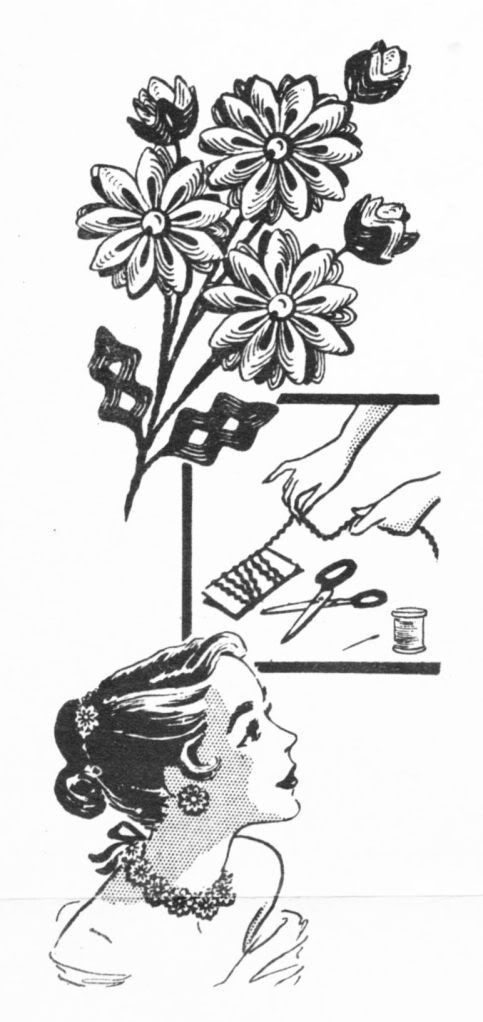
Make Rick-Rack Jewelry!

I love me some rick-rack, but usually we see it on clothing. Here's a way to use it to make charming little flowers, leaves and buds. Decorate everything!
Think of the sweet gifts you could make, mixing the colors and sizes to make these very personal and special. Have fun!


This pattern contains complete diagrams and instructions for making rick-rack jewelry. Suggestions are given for other accessory uses.

MATERIAL REQUIREMENTS:
1/2 inch rick-rack in desired color or colors; household cement; thread-, earring backs; pearls or rhinestones for centers; copper screen wire for corsage stems; 1/4 inch ribbon for necklace or bracelet.
CUTTING RICK-RACK: For each flower, cut two pieces of rick-rack so that when ends are pasted together there are 18 points on each side. For each leaf, cut -1 piece of rick-rack so that there are 5 points when finished. For each bud, cut 2 pieces of rick-rack so that there are 4 points when finished.
MAKING FLOWERS: Join strips of rick-rack by overlapping ends and securing them with clear household cement. When cement is dry, cut away excess overlap on both sides. Lay one circle of rickrack inside the other as shown in Detail 1. Run a double thread through points of rick-rack as illustrated in Detail 1 and gather tightly and evenlv (see Detail 2); secure thread. Attach a pearl or rhinestone in center (see Detail 3). Make as many as needed.
MAKING LEAVES: Fold a piece of wire 16 inches long in half. Starting at fold of wire, sew points of rick-rack together and to wire to form leaf as shown in Detail 4. Make as many as needed.
MAKING BUDS: Fold a piece of wire 16 inches long in half. Join ends of each strip for bud same as for flower. Place circles of rick-rack together, run a thread through center (see Detail 5) and pull together tightly; secure thread. Sew bud securely to top of wire. Make as many as needed.
ASSEMBLING FLOWERS ' LEAVES AND BUDS: See Illustrations. CORSAGE: Sew each flower securely to a piece of wire. Arrange leaves,, buds and flowers as desired and wire all together at uppermost point. NECKLACE OR BRACELET: Sew flowers securely to a piece of ribbon. EARRINGS: With household cement, attach back of flowers to earring backs. For suggestions for other uses, see illustrations.